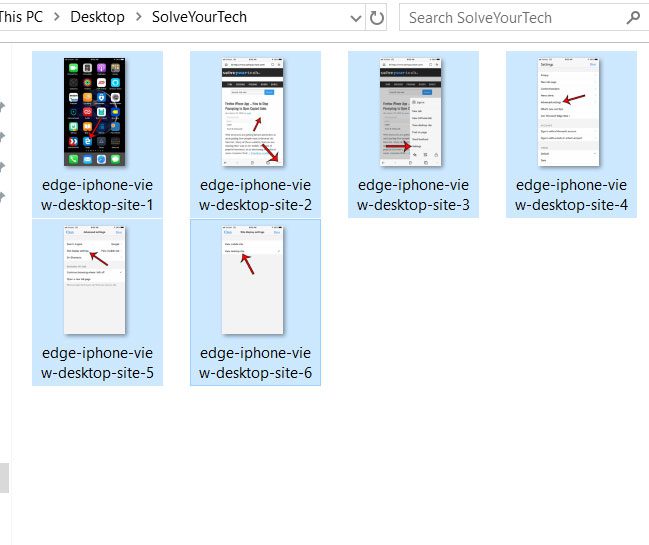
This is something that’s available to you in Windows 10, and it doesn’t require you to use any additional expensive applications. You are able to use a helpful feature within the Windows 10 folder system where you simply open a folder with pictures, select the pictures, then start the slideshow.
Using the Slideshow Feature for Pictures in Windows 10
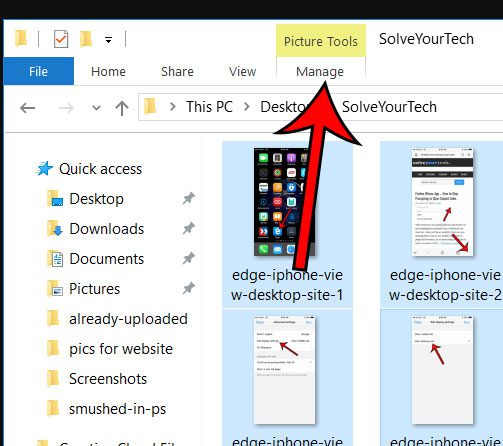
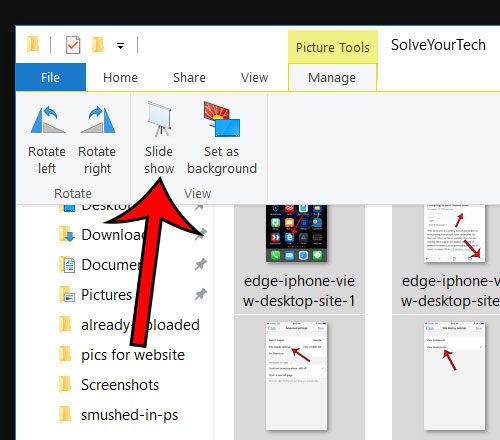
The steps in this article were performed on a laptop computer using the Windows 10 operating system. This guide assumes that you already have a folder containing pictures and that you wish to view them as a slideshow. If you would like to take pictures of your screen like the ones used in this article then check out our guide to Windows 10 screenshots. Step 1: Navigate to the folder containing the pictures you want to view in a slideshow. Step 2: Click the first picture to include in the slideshow, then press and hold the Shift key on your keyboard and click the last picture. This will select all of the pictures between the first and last picture as well. Alternatively you can hold down the Ctrl key and click each picture individually. Step 3: Select the Manage option at the top of the window under Picture Tools. Step 4: Choose the Slide show option. Step 5: You can exit the slideshow by pressing the Esc key on your keyboard. You can also view the slide show controls by right-clicking on the screen during the slide show. Do you often have trouble seeing your mouse cursor on the screen? Find out how to change the mouse color in Windows 10 and try one of the other options. After receiving his Bachelor’s and Master’s degrees in Computer Science he spent several years working in IT management for small businesses. However, he now works full time writing content online and creating websites. His main writing topics include iPhones, Microsoft Office, Google Apps, Android, and Photoshop, but he has also written about many other tech topics as well. Read his full bio here.
You may opt out at any time. Read our Privacy Policy


