One of the ways that your Apple Watch works is to measure your heart rate. It can use this information in a couple of different ways, but one of those involves monitoring your activity for certain warning signs. For instance, if you have been inactive for 10 minutes and your heart rate rises to a high level, this may be a bad sign. Our tutorial below will show you how to set the BPM level at which your Apple Watch will send you such a notification.
How to Change the Heart Rate Level Notification on the Apple Watch
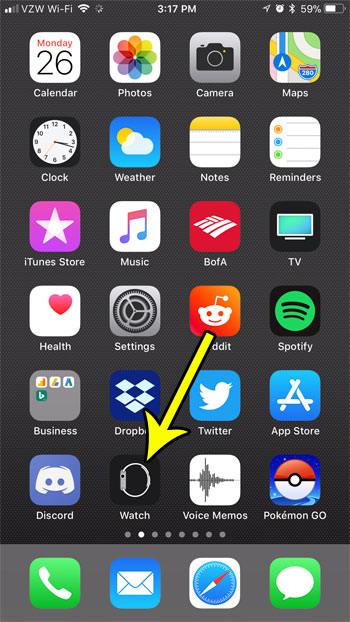
The steps in this article were performed on an iPhone 7 Plus in iOS 11.2.2 for an Apple Watch 2 using the WatchOS 4.3.2 operating system. The setting that we are going to be changing involves the notification that your Apple Watch can send if you have been inactive for 10 minutes, but your heart rate is rising. You can select from several different options, or you can elect to turn it off entirely. Step 1: Open the Watch app on your iPhone.
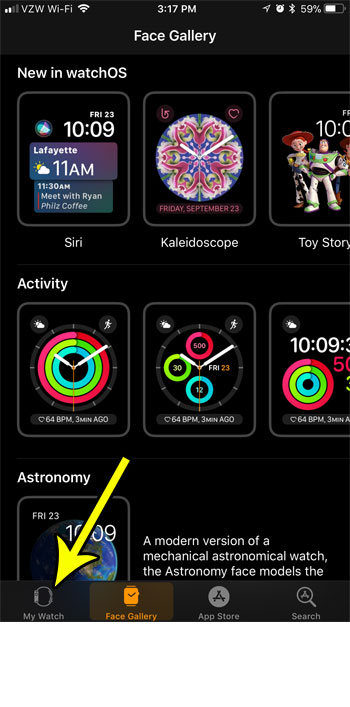
Step 2: Select the My Watch tab at the bottom-left corner of the screen.
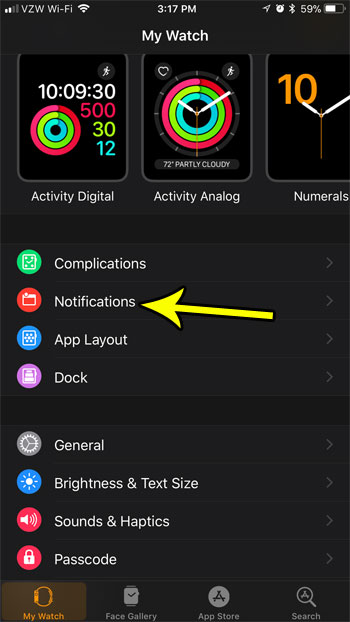
Step 3: Choose the Notifications option.
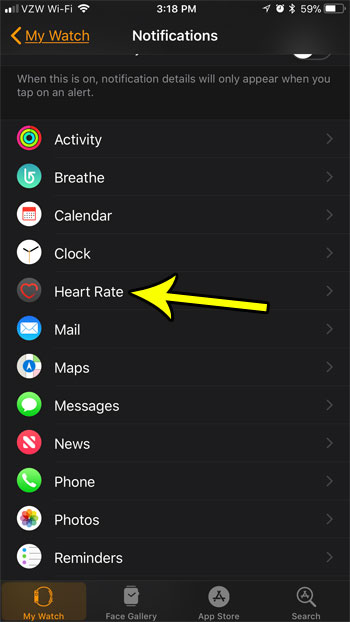
Step 4: Scroll down and select the Heart Rate option.
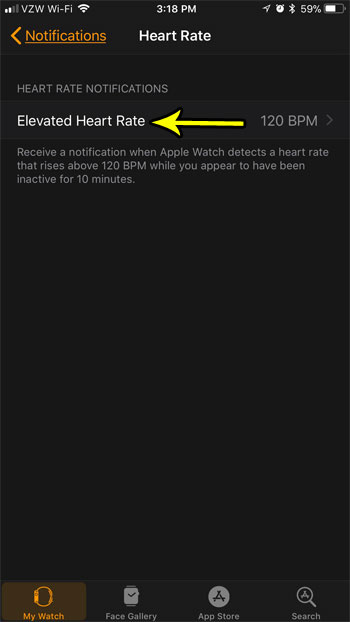
Step 5: Touch the Elevated Heart Rate button.
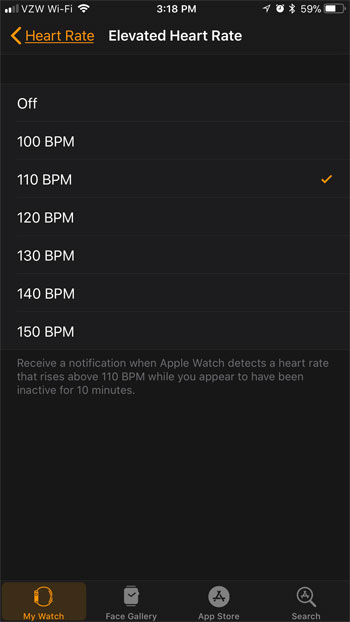
Step 6; Tap the BPM (beats per minute) level at which you would like your watch to alert you. As mentioned earlier, this will only occur when you have been inactive for ten minutes.
Your Apple Watch interacts with a lot of the apps on your iPhone, even some that you might not have considered. Find out how to use your Apple Watch to control your iPhone’s camera if, for example, you want to be able to take a picture from your iPhone without even holding it. He specializes in writing content about iPhones, Android devices, Microsoft Office, and many other popular applications and devices. Read his full bio here.
