Windows 7 Cursor Blink Rate
Like most of the other settings that you can configure in Windows 7, this option is found on the Control Panel. You should familiarize yourself with this menu, as it is a good way to personalize your Windows 7 installation and make it work better for your needs. Step 1: Click the Start button, then click Control Panel in the column at the right side of the menu. Step 2: Click the View by drop-down menu at the top-right corner of the window, then click the Small Icons option.
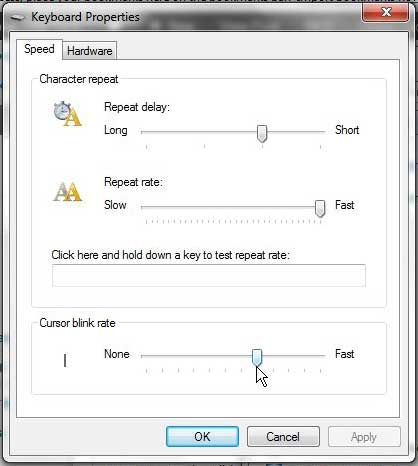
Step 3: Click the blue Keyboard link at the center of the window. Step 4: Drag the slider under the Cursor blink rate section either to the left to make it slower, or to the right to make it faster.
Step 5: Click the Apply button, then click the OK button. After receiving his Bachelor’s and Master’s degrees in Computer Science he spent several years working in IT management for small businesses. However, he now works full time writing content online and creating websites. His main writing topics include iPhones, Microsoft Office, Google Apps, Android, and Photoshop, but he has also written about many other tech topics as well. Read his full bio here.
You may opt out at any time. Read our Privacy Policy