When you start typing in a Word document that is using the Normal template, all of the text that you enter will be left aligned by default. This means that the first letter on each line will be against the left margin of the page. This is the standard for most corporations and institutions, and is the most common alignment format used in documents. But sometimes a part of your document will need to be centered on the page, either horizontally or vertically. Our tutorial below will show you how to center text in Microsoft Word using either the horizontal or vertical alignment option so that you can achieve the desired display result for your document.
How to Horizontally Center Text in Microsoft Word
How to Vertically Center Text in Microsoft Word
Our article continues below with additional information on how to center align text in Microsoft Word, including expanded sections with pictures for the steps above. You may also want to know how to get rid of space after paragraphs in Google Docs if you use that application for document editing, too.
Expanded – How to Center Text in Microsoft Word Horizontally
The summary section above gives a brief overview of how to horizontally center text in Word, but this section provides pictures as well if you would like a little more information. Note that I am using Microsoft Word 2013 in the images below, but the process is the same in most other versions of Word as well. Find out how to use all small caps in Word if you have been struggling to manually apply that formatting in your document.
Step 1: Open your document in Microsoft Word.
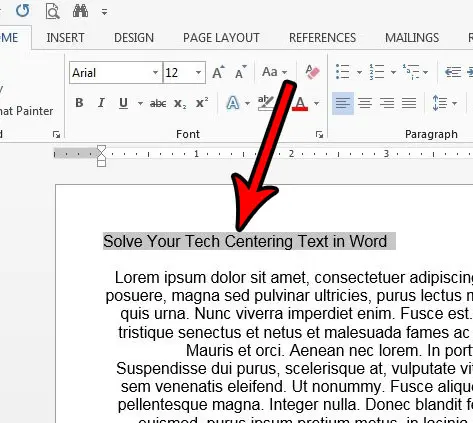
Step 2: Use your mouse to highlight the text that you want to center horizontally.
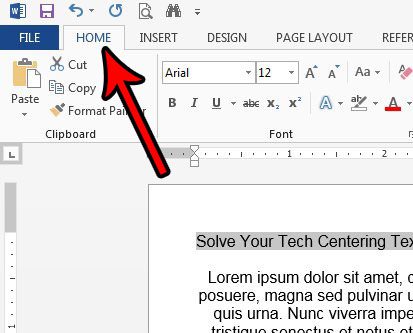
Step 3: Click the Home tab at the top of the window.
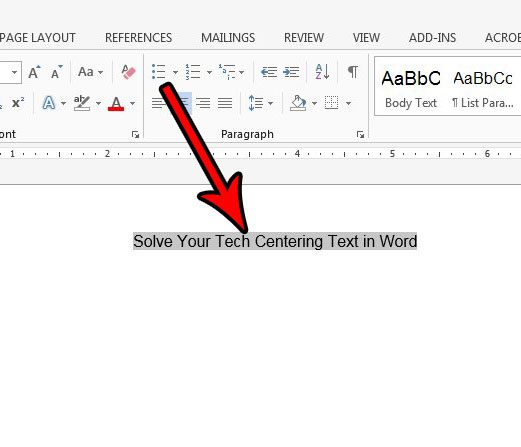
Step 4: Select the Center button in the Paragraph section of the ribbon.
The next section includes information on how to center text vertically if the text you want to modify in your document needs to be in the middle of the page.
Expanded – How to Center Text in Microsoft Word Vertically
We outlined how to vertically center text in the summary section above, but this section will provide images as well. This section was performed using Microsoft Word 2013.
Step 1: Open your document in Microsoft Word.
Step 2: Use your mouse to select the text that you want to center vertically.
If you wish to center the entire document you can skip this step.
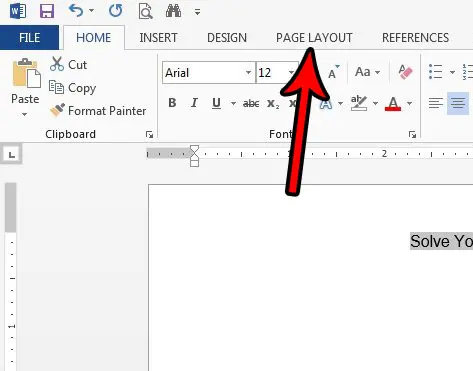
Step 3: Click the Page Layout tab at the top of the window.
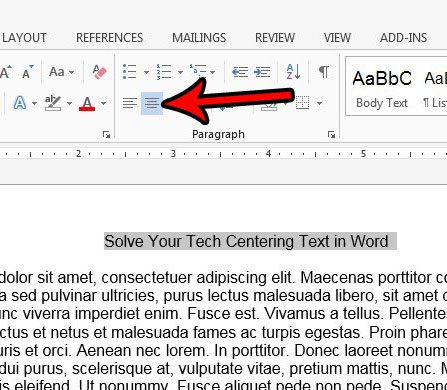
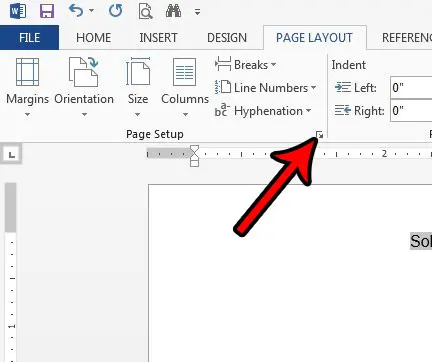
Step 4: Click the Page Setup button in the Page Setup section of the ribbon.
It’s the tiny button at the bottom-right corner of the section.
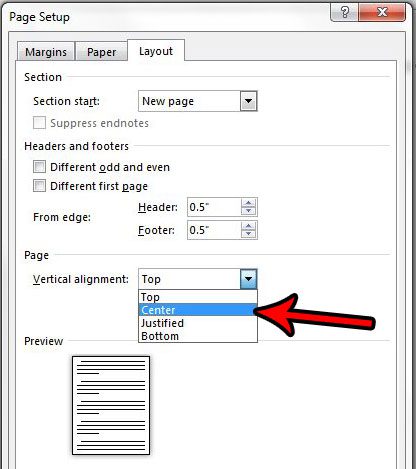
Step 5: Click the dropdown menu to the right of Vertical alignment, then choose the Center option.
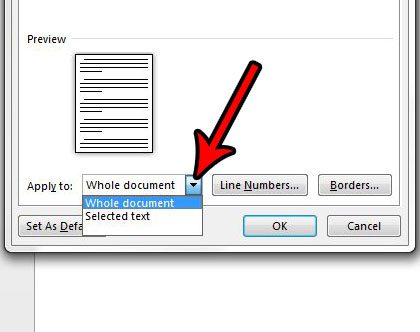
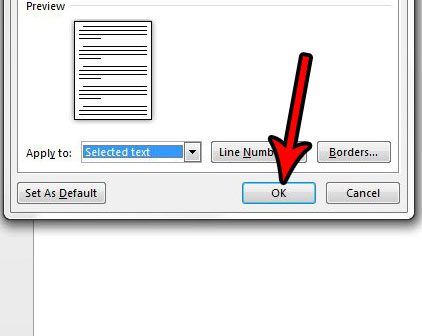
Step 6: Select the dropdown menu to the right of Apply to, then choose the option that fits your needs.
If you selected text earlier, then the Selected sections option will only vertically center that selected text. The Whole document option will vertically center the entire document, and the This point forward will vertically center all of the document text after the point at which your mouse cursor is currently located. Some of the vertical alignment options may not appear depending on the selected text’s locations, whether or not any text is selected, or the composition of the document.
Step 7: Click the OK button to apply the vertical centering.
How to Center Text in a Table in Microsoft Word
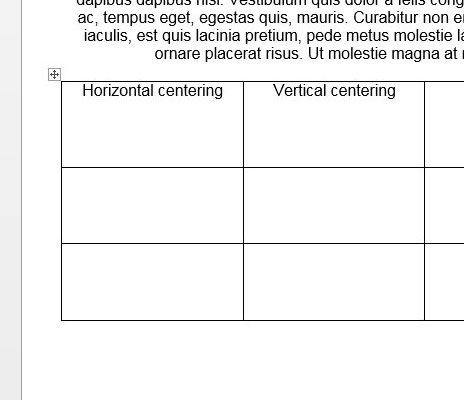
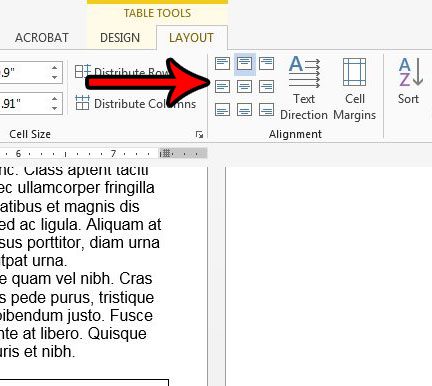
If you have a table in your document and need to center the text in one of the table cells, then you get to use some table-specific centering options. By default the data in your table will be horizontally centered at the top of the table cell, but there are options that let you customize the alignment within a cell.
Step 1: Open the document containing the table text that you want to center.
Step 2: Click inside the cell containing the data you wish to center.
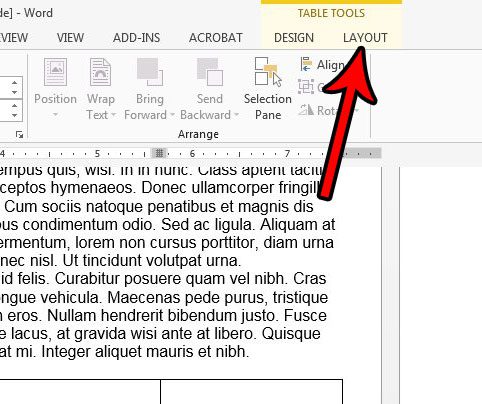
Step 3: Click the Layout tab at the top of the window under Table Tools.
Step 4: Click the desired alignment option in the Alignment section of the ribbon.
Additional Notes on How to Center Text in Word
You can also center text horizontally by selecting it then pressing Ctrl + E on your keyboard. One of the most common reasons to align text either horizontally or vertically is to add a title. if you are adding a title, be sure to check your work or school’s guidelines on titles, as they often include additional requirements like font sizes. You can adjust font styles in the Font section of the ribbon on the Home tab. If you center some text in your document, the center align text setting will typically persist. You will likely need to select the Left Align option after centering your text if you want to return to normal text alignment after centering some of your text. If you vertically center text in Word you will have several options concerning what parts of your document should be centered. These options include the selected text, the whole document, or “this point forward.”
Does your document have a title page, but you need to number your pages and skip that title page? Find out how to start page numbering on the second page in Word so that a page number doesn’t display on the title page.
Additional Sources
After receiving his Bachelor’s and Master’s degrees in Computer Science he spent several years working in IT management for small businesses. However, he now works full time writing content online and creating websites. His main writing topics include iPhones, Microsoft Office, Google Apps, Android, and Photoshop, but he has also written about many other tech topics as well. Read his full bio here.
You may opt out at any time. Read our Privacy Policy
