A common formatting option if your school or organization uses MLA involves adding your last name and page numbering at the top-right of the page. But if you have never done this before in Microsoft Word it can be a little confusing. Luckily Microsoft Word has several options for adding page numbers to the header or footer of the document, and you can even customize those further if you need a different first page or title page. Our step by step guide below is going to show you how to insert your last name and page number in a Microsoft Word document.
How to Add Last Name and Page Number in Word
Our article continues below with additional information on adding your last name and page number in Microsoft Word, including pictures of these steps.
How to Put Your Last Name Next to the Page Number in Microsoft Word
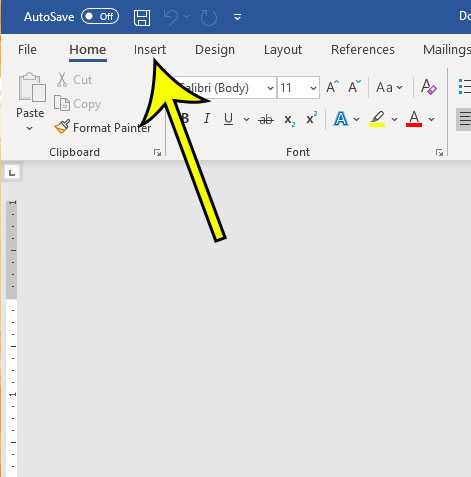
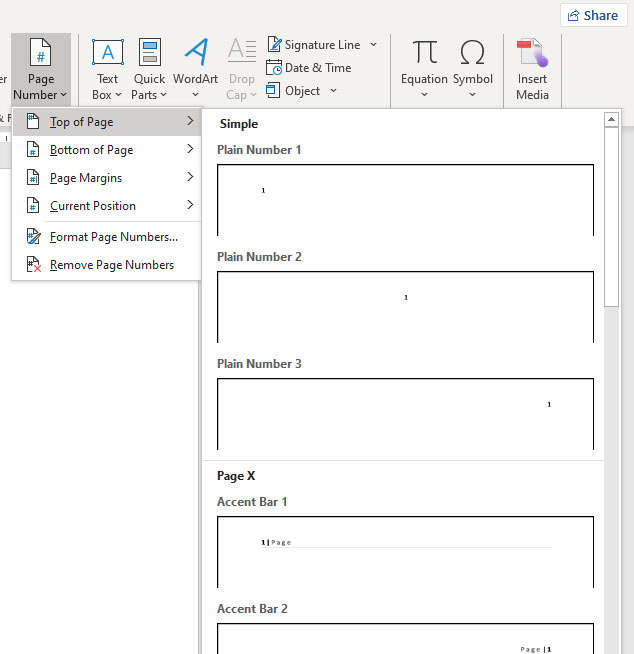
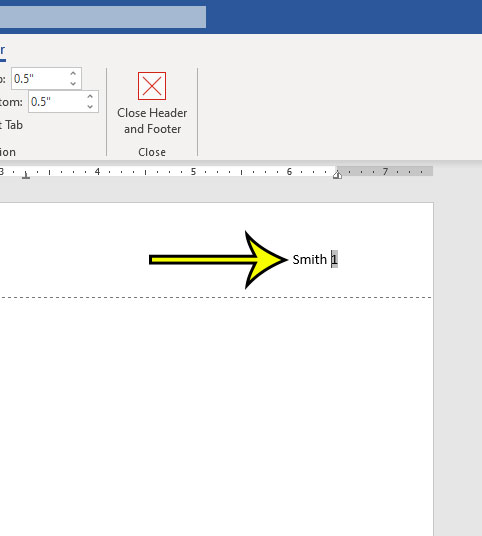
The steps in this article were performed in the Microsoft Word for Office 365 version of the application. I am going to be using the Top of Page option for my page numbers, and placing those page numbers at the right side of the header. The last name will then be added to the left of the page number, where I will also manually add a space so that the name and page number have some separation. You can then return to the document body if you double-click on any part of it. You can also double-click inside the footer or header area later if you need to edit some of the information that you have added to that location. As mentioned earlier I am selecting Top of Page and the Plain Number 3 option, which places the page number at the top right of each page. Now that you know how you put your name and a page number in the header you can use a similar method if you need ot put your document there instead, or some other static information aside from your name.
How to Stop Displaying Header Information on the First Page or Title Page in Word
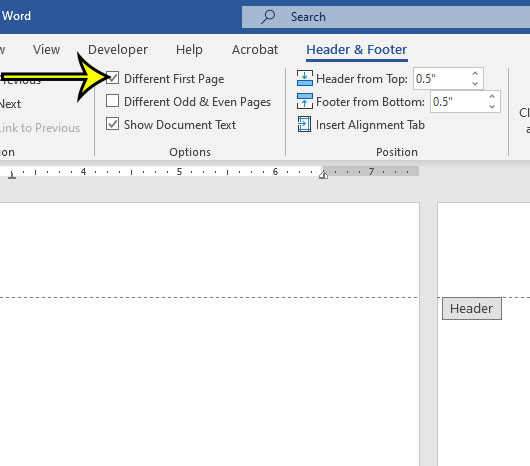
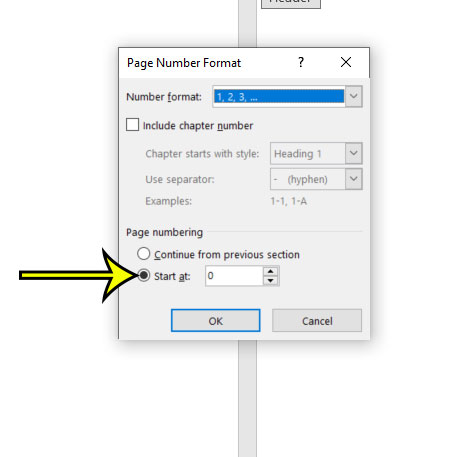
We previously mentioned that while you can add page numbers to every page with this method, it doesn’t provide the desired result if you don’t want to have a page number on the first page of your document, or if you have a title page on which you don’t want a page number. You can adjust this by double-clicking inside the header or footer of the document, then checking the box to the left of Different First Page in the Options section of the ribbon. This removes the page number from the first page of the document, but keeps the page numbers on subsequent pages. Note that the page numbering starts with “2” on the second page of the document when you select this option and will continue for the entire document. If you wish to start with “1” on that second page then you will need to click the Insert tab, click Page Number, then choose Format Page Numbers from the drop-down menu. This opens the Page Number Format dialog box. There you will click the circle to the left of Start at, then enter “0” into that field and click the OK button. Note in the image above that there are a couple of other options on this menu that let you format page numbers in other ways, or add additional information or elements to your header or footer. If you also use Google Docs and need to be able to add your last name and page number there, then this article will show you how.
There you will be able to edit footer and header options and positions. You can also click in the Header and Footer group on the Header & Footer tools design tab to change the style of those sections, or to edit or select format settings for your page numbers. Simply delete the existing page number style, then click the Page Number button and scroll down to the Page X of Y option and select one of those styles instead.
He specializes in writing content about iPhones, Android devices, Microsoft Office, and many other popular applications and devices. Read his full bio here.
